Friday, March 26, 2010
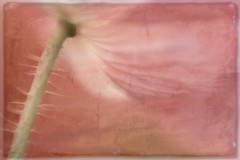
Lensbaby Texture Overlay
I was taken to these flowers by a conservatory employee, who was very excited about the photo possibilities. So, I get there and the flowers were creeping up a wired trellis and was very busy and unorganized. After I thanked her profusely, she left. I planned on leaving via a different doorway so that she wouldn't see me and possibly be offended. But, as I walked around the area I was thinking of how to treat this subject to make it simpler and more visually palatable. My first move to choose to shoot the lensbaby w/ a wide aperture to completely blur the background, yet achieve some selective focus, and lowering the prominence of the wires. This simplified the image, but it still wasn't quite where I wanted it to be. One of the "secrets" to texture overlays is to pick the right one to compliment the subject. The "chipped" part of the texture worked well on the left 2/3 of the frame, and the sharpest flowers in the scene advanced against the cool background. Also, compositionally, visual movement was created by three twigs flowing diagonally from right to left.
Sunday, March 14, 2010
Himalayan blue poppy
Still having fun with Totally Rad's Dirty Pictures texture plugin.
I thought that this mid eastern wall pattern would work well over the Himalayan blue poppy, kind of giving it a sense of place. The depth in this was created by painting out the texture from the orange center.
Back to Longwood Gardens in the morning!
LWG flowers/texture overlay
Saturday, March 13, 2010
Textured backgrounds Plugin
Click on the sidebar icon to either download a free trial or to purchase this plugin and/or others!
Pretty fun stuff!
Wednesday, March 10, 2010
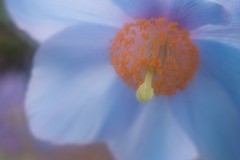
Blue Poppy
The display of Himalayan blue poppies is an annual event at Longwood Gardens, PA. Having shot these flowers many times, I tried something a little different this year. The new Lensbaby soft focus optic is tremendous, rendering a very different look, especially in how it creates a marbled background, even with busy backgrounds. I used the widest soft focus aperture ring, so I had to choose where to focus for greatest acceptable sharpness. I focused on the orange middle, letting the outer bright tip to go a bit soft. I used Nik's Viveza 2 to saturate the middle and to darken the background.
Thursday, March 4, 2010
Summer flowers
This is a 10 multiple exposure image. I'm using auto focus on the yellow center and moving the camera minimally between exposures. Rather than hand holding the camera and moving fluidly from exposure to exposure, the camera remained on the tripod. I loosened the tripod collar on the Nikkor 200mm micro lens and twisted the camera/lens in very small increments (as long as the auto focus point remained inside the yellow) to get this image. Of equal importance, actually more important, is the background. Backgrounds can make or break an image. The flowers are in the shade and the background is in bright sun. When out of focus, bright grasses become bright, complimentary backgrounds, as in this case. I also shot at a more open aperture in order to focus attention on the bright yellow center. In post process, Saturation and contrast in the yellow were increased using nik's Viveza.
Wednesday, March 3, 2010
Telephoto tulips
This image is an example of using a 300mm lens at it's minimum focusing distance: wide open @ 4.5'. The relatively close focusing distance is what accounts for the very shallow depth of field and selective focus. Long lenses compress scenes like this, where the red is literally in a different garden across the grounds, creating a soft color palette around the sharp part of the flower. Also, worthy of note is that you really don't need to make sure the out of focusness is only behind the subject. The large out of focus flower to the lower right is in front of the main subject, but appears as soft as the background flowers. What is important is that there be some distance between the sharp flower and the others (in back of and in front of the subject). Even though I use an unaltered 300mm f/4 lens for this shot, I'll mostly add attachments, such as extension tubes, close up diopter, and teleconverter, depending on what I'm looking to do. NOTE: When shooting wide open, I use autofocus to find an edge. This ensures even minimal sharpness.
Tuesday, March 2, 2010
Light on White
I've always been reluctant to use flash on flowers, especially white flowers. But, with the advent of Nikon's R1C1 macro studio "Creative Lighting System (CLS), I was amazed at how well it worked here. With the lower power flashes and the ability to dial back the power, hand held macro flash photography gives the photographer the ability to work in areas where "no tripod has gone before..."
Two flashes used, the secondary dialed back one stop less than the primary flash. Shot at a great outdoor arboretum on Whidbey Island, WA, and was used on a Nikon advertising campaign for the R1C1.
White Rose
Here's an image made with only window light. No software, no adjustments, filters, nor reflector disk. Just soft, warm natural light with good subject placement to get modeling light with no dark areas.
This image appeared on the 2007 Nikon calendar.
This image appeared on the 2007 Nikon calendar.
Monday, March 1, 2010
African Blue Poppy & Topaz Adjust 4
This very cool effect is made using the new Topaz Adjust 4!
The African Blue Poppy was optimized using the
Painting:Venice filter preset, then adjusting further
using the manual settings.
There are many other filter options!
If you want to check out or purchase Topaz Adjust 4, go here:
TopazLabs
Special deal March 1- March 15 ONLY!!
Coupon Code - NEWADJUST
$10 discount on Adjust 4
20% discount on Adjust-Bundle upgrade
Pretty cool stuff!!
Watch your backs...
I was having a difficult time finding a shot on this particular day. I don't know. Things just weren't clicking.
Then out of nowhere, this shows up. The flowers had a natural vertical configuration and the stems were not decayed. The green acted as a natural color balancing agent to the pink tulips. All I had to do was to get the bright concrete floor out of the background. It didn't do much maneuvering to get some faded red and dark green in the background. Then slightly twisting the camera created the diagonal movement from bottom right to top left.
Textured Glass
This image was shot in my very modest home macro/flower studio, which consists of a table, small background, and 2 RPS studio lights. This image has been displayed by Nikon at PhotoExpo and PhotoWest a few times. The lens is stopped all the way down, but the background flowers are very soft, however, there is detail apparent. Seems ironic. Very simple. There's a piece of subtle textured glass between the first flower and the rest of them, which would render the soft background regardless of aperture. Using f/22 insured that the foreground flower would be razor sharp, especially in the stamen.
Soft focus flowers
This was shot hand held using the new Lensbaby Soft Focus optic w/ the default aperture ring. What I find remarkable here is how the soft focus optic renders the flower centers very sharp, but also has the soft focus glow. Not as apparent here is marbled background, which is also indicative of using this optic.
Iceland poppy and Texture Blend
A textured red wall and a lensbaby was used to create this composition. The textured wall fills in the background color and the opacity was adjusted to bring out the texture in the bottom flower petal.
This Texture Blending action is available from http://handbook.outbackphoto.com/section_photo_tuning_filters/index.html
Then go to the Artistic heading. It's the only action under the heading.
This Texture Blending action is available from http://handbook.outbackphoto.com/section_photo_tuning_filters/index.html
Then go to the Artistic heading. It's the only action under the heading.
Subscribe to:
Comments (Atom)


.jpg)


